> ## Documentation Index
> Fetch the complete documentation index at: https://docs.dune.com/llms.txt
> Use this file to discover all available pages before exploring further.
# Getting Started
> Set up your dbt project and connect to Dune
The fastest way to get started is using our [dbt template repository](https://github.com/duneanalytics/dune-dbt-template), which includes pre-configured profiles, sample models, and CI/CD workflows.
## Prerequisites
* **Dune Enterprise account** with Data Transformations enabled
* **Dune API key** ([generate one here](https://dune.com/settings/api))
* **Team name** on Dune (defines your namespace)
* **dbt installed locally** (we recommend using `uv` for dependency management)
## 1. Use the Template Repository
We provide a complete dbt project template to get started quickly:
**GitHub Template**: [github.com/duneanalytics/dune-dbt-template](https://github.com/duneanalytics/dune-dbt-template)
The template includes:
* Pre-configured dbt profiles for dev and prod environments
* Sample models demonstrating all model types
* GitHub Actions workflows for CI/CD
* Cursor AI rules for dbt best practices on Dune
* Example project structure following dbt conventions
**CI Workflows Are Disabled by Default**
The template repository ships with GitHub Actions CI workflows **disabled by default**. Since each dbt execution consumes Dune credits, we recommend:
1. Running models locally first to get familiar with your pipeline
2. Reviewing the [Pricing & Best Practices](/api-reference/connectors/dbt/pricing-best-practices) guide
3. Enabling workflows when you're ready by uncommenting triggers in the workflow files (see the [template README](https://github.com/duneanalytics/dune-dbt-template#-note-) for instructions)
**To use the template:**
```bash theme={null}
# Create a new repository from the template
# (Use GitHub's "Use this template" button)
# Clone your new repository
git clone https://github.com/your-org/your-dbt-project.git
cd your-dbt-project
# Install dependencies
uv sync
# Set up environment variables (see next section)
```
## 2. Configure Environment Variables
Set these required environment variables:
```bash theme={null}
# Required
export DUNE_API_KEY="your_api_key_here"
export DUNE_TEAM_NAME="your_team_name"
# Optional - for personal dev environments
export DEV_SCHEMA_SUFFIX="alice"
```
**Persistence options:**
```bash theme={null}
# Option 1: Add to shell profile (recommended for local dev)
echo 'export DUNE_API_KEY="your_key"' >> ~/.zshrc
echo 'export DUNE_TEAM_NAME="your_team"' >> ~/.zshrc
source ~/.zshrc
# Option 2: Use a .env file (remember to add to .gitignore!)
# Option 3: Set in CI/CD secrets for production deployments
```
## 3. Configure dbt Profile
Your `profiles.yml` should look like this:
```yaml theme={null}
dune:
outputs:
dev:
type: trino
method: jwt
user: "{{ env_var('DUNE_TEAM_NAME') }}"
jwt_token: "{{ env_var('DUNE_API_KEY') }}"
host: trino.api.dune.com
port: 443
database: dune
schema: "{{ env_var('DUNE_TEAM_NAME') }}__tmp_{{ env_var('DEV_SCHEMA_SUFFIX', '') }}"
http_scheme: https
session_properties:
transformations: true
prod:
type: trino
method: jwt
user: "{{ env_var('DUNE_TEAM_NAME') }}"
jwt_token: "{{ env_var('DUNE_API_KEY') }}"
host: trino.api.dune.com
port: 443
database: dune
schema: "{{ env_var('DUNE_TEAM_NAME') }}"
http_scheme: https
session_properties:
transformations: true
target: dev
```
The `transformations: true` session property is **required**. This tells Dune that you're running data transformation operations that need write access.
## 4. Test Your Connection
```bash theme={null}
# Install dbt dependencies
uv run dbt deps
# Test connection
uv run dbt debug
# Run your first model
uv run dbt run
# Run tests
uv run dbt test
```
## Project Structure
The template repository follows standard dbt conventions:
```
your-dbt-project/
├── models/
│ ├── templates/ # Example models for each strategy
│ │ ├── dbt_template_view_model.sql
│ │ ├── dbt_template_table_model.sql
│ │ ├── dbt_template_merge_incremental_model.sql
│ │ ├── dbt_template_delete_insert_incremental_model.sql
│ │ └── dbt_template_append_incremental_model.sql
│ └── your_models/ # Your transformation models
├── macros/
│ └── dune_dbt_overrides/
│ └── get_custom_schema.sql # Schema naming logic
├── tests/ # Custom data tests
├── seeds/ # CSV seed files
├── snapshots/ # Snapshot definitions
├── analyses/ # Ad-hoc analyses
├── .github/workflows/ # CI/CD workflows (disabled by default—see note above)
├── profiles.yml # dbt connection profile
├── dbt_project.yml # Project configuration
└── README.md
```
## Schema Organization
Schemas are automatically organized based on your dbt target:
| Target | DEV\_SCHEMA\_SUFFIX | Schema Name | Use Case |
| ------ | ------------------- | ------------------- | --------------------------- |
| `dev` | Not set | `{team}__tmp_` | Local development (default) |
| `dev` | Set to `alice` | `{team}__tmp_alice` | Personal dev space |
| `dev` | Set to `pr123` | `{team}__tmp_pr123` | CI/CD per PR |
| `prod` | (any) | `{team}` | Production tables |
This is controlled by the `get_custom_schema.sql` macro in the template.
## How It Works
### Namespace Isolation
All tables and views you create are organized into your team's namespace:
* **Production schema**: `{your_team}` - For production tables
* **Development schemas**: `{your_team}__tmp_*` - For development and testing
This ensures complete isolation between teams and between development/production environments.
### Write Operations
Execute SQL statements to create and manage your data:
1. **Create tables and views** in your namespace
2. **Insert, update, or merge** data using standard SQL
3. **Drop tables** when no longer needed
4. **Optimize and vacuum** tables for optimal performance when querying these tables
All operations are authenticated via your Dune API key and restricted to your team's namespace.
### Data Access
**What You Can Read:**
* **All public Dune datasets**: Full access to blockchain data across all supported chains
* **Your uploaded data**: Private datasets you've uploaded to Dune
* **Your transformation outputs**: Tables and views created in your namespace
* **Materialized views**: Views that are materialized as tables in your namespace via the APP
**What You Can Write:**
* **Your team namespace**: `{team_name}` for production tables
* **Development namespaces**: `{team_name}__tmp_*` for dev and testing
* **Private by default**: All created tables are private unless explicitly made public
**Access Control:**
* Write operations are restricted to your team's namespaces only
* Cannot write to public schemas or other teams' namespaces
* Schema naming rules enforced: no `__tmp_` in team handles
## Querying dbt Models on Dune
When querying your dbt models in the Dune app or via the API, you **must** use the `dune.` catalog prefix.
**Pattern**: `dune.{schema}.{table}`
```sql theme={null}
-- ❌ Won't work (dbt logs show this but it won't work on Dune)
SELECT * FROM my_team.my_model
-- ✅ Correct
SELECT * FROM dune.my_team.my_model
SELECT * FROM dune.my_team__tmp_alice.dev_model
```
dbt logs omit the catalog name for readability, so remember to add `dune.` when using queries in the Dune app.
## Where Your Data Appears
Tables and views created through dbt appear in the **Data Explorer** under:
**My Data → Connectors**
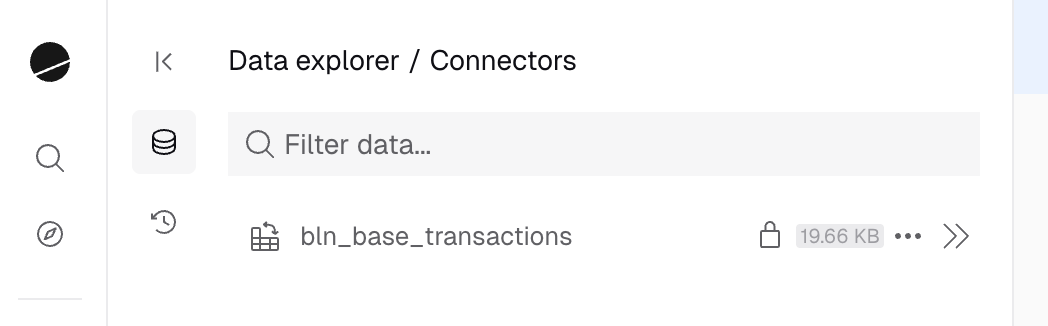 You can:
* Browse your transformation datasets
* View table schemas and metadata
* Delete datasets directly from the UI
* Search and reference them in queries
## Next Steps
Learn about merge, delete+insert, and append strategies
Set up GitHub Actions and development workflows
You can:
* Browse your transformation datasets
* View table schemas and metadata
* Delete datasets directly from the UI
* Search and reference them in queries
## Next Steps
Learn about merge, delete+insert, and append strategies
Set up GitHub Actions and development workflows